
Starting an online store in Bangladesh has never been more straightforward. But there is one part that trips almost everyone up - payments.
Shopify works brilliantly for everything else: store design, product management, order tracking, marketing. The problem is that Shopify was built for international markets. It does not know what bKash is. It has never heard of Nagad.
So what do most Bangladeshi merchants do? They write "send bKash to 01XXXXXXXXX" in their order confirmation email and manually track payments in a spreadsheet. That works for five orders a week. It falls apart at fifty.
This guide covers how to set up your Shopify store properly, and how to plug bKash and Nagad into it so payments run automatically - without hiring a developer or building custom code.
Before You Start - What You Will Need
- A Shopify account (free 3-day trial, then plans from ~$5/month with the Starter plan or $29/month for Basic)
- A bKash Merchant account with Tokenized Checkout credentials (App Key, App Secret, Username, Password)
- A Nagad Merchant account with your Merchant ID and credentials
- A trade license - not required to start, but needed for payment gateway approval from bKash and Nagad
If you do not have merchant accounts yet, apply directly on the bKash and Nagad merchant portals. Approval typically takes 3–7 business days.
Step 1 - Create Your Shopify Store
Go to shopify.com and sign up. Pick a store name that reflects your brand - you can always change the display name later, but the myshopify.com subdomain stays permanent.
Once inside your admin, do three things first:
Set your store currency to BDT (Bangladeshi Taka) Go to Settings → Store details → Currency → select BDT
Set your time zone to Dhaka (UTC+6) Settings → Store details → Time zone
Add your store address and phone number This appears on invoices and is required for certain payment gateways
Step 2 - Choose a Theme and Add Your Products
Shopify's free themes - Dawn, Sense, and Craft - are clean and mobile-friendly. Most Bangladeshi shoppers browse on phones, so pick something that looks good on a small screen first.
Add your products with:
- Clear photos (white background converts best for product shots)
- Prices in BDT
- Variants set up properly (size, color) if you sell physical goods
- Shipping weights filled in if you plan to use courier integrations
Do not overthink the design at launch. A clean store with good product photos will outsell a fancy store with mediocre photos every time.
Step 3 - Handle the Payment Problem
Here is where most Bangladeshi Shopify guides stop - they tell you to use Shopify Payments or Stripe, which are not available in Bangladesh. So what are your actual options?
| Method | What Actually Happens |
|---|---|
| Shopify Payments / Stripe | Not available for Bangladesh merchant accounts |
| PayPal | Not supported for BD merchants receiving payments |
| Manual payment (bank transfer) | Works, but 100% manual order management |
| BD Wallet (bKash + Nagad) | Automated payment links, auto order confirmation |
The only real automated solution for Bangladesh right now is BD Wallet. It connects your Shopify store to both bKash and Nagad, sends payment links to customers automatically, and marks orders as paid the moment money lands in your account.
Step 4 - Install BD Wallet
From your Shopify admin go to Apps → Search "BD Wallet" → Install.
Once installed, open the app and follow these steps:
Add Your bKash Credentials
Go to Settings → bKash and enter:
- App Key
- App Secret
- Username
- Password
Click Save. Your credentials are encrypted with AES-256-GCM - they are never stored in plain text.
Add Your Nagad Credentials
Go to Settings → Nagad, enter your Merchant ID and credentials, click Save.
Enable Both Gateways
Toggle bKash and Nagad to Active. BD Wallet registers them as payment methods in your Shopify store automatically.
From this point, every order your store receives will trigger an automatic payment link sent to the customer by email and SMS. When they pay via bKash or Nagad, your Shopify order updates to Paid on its own.
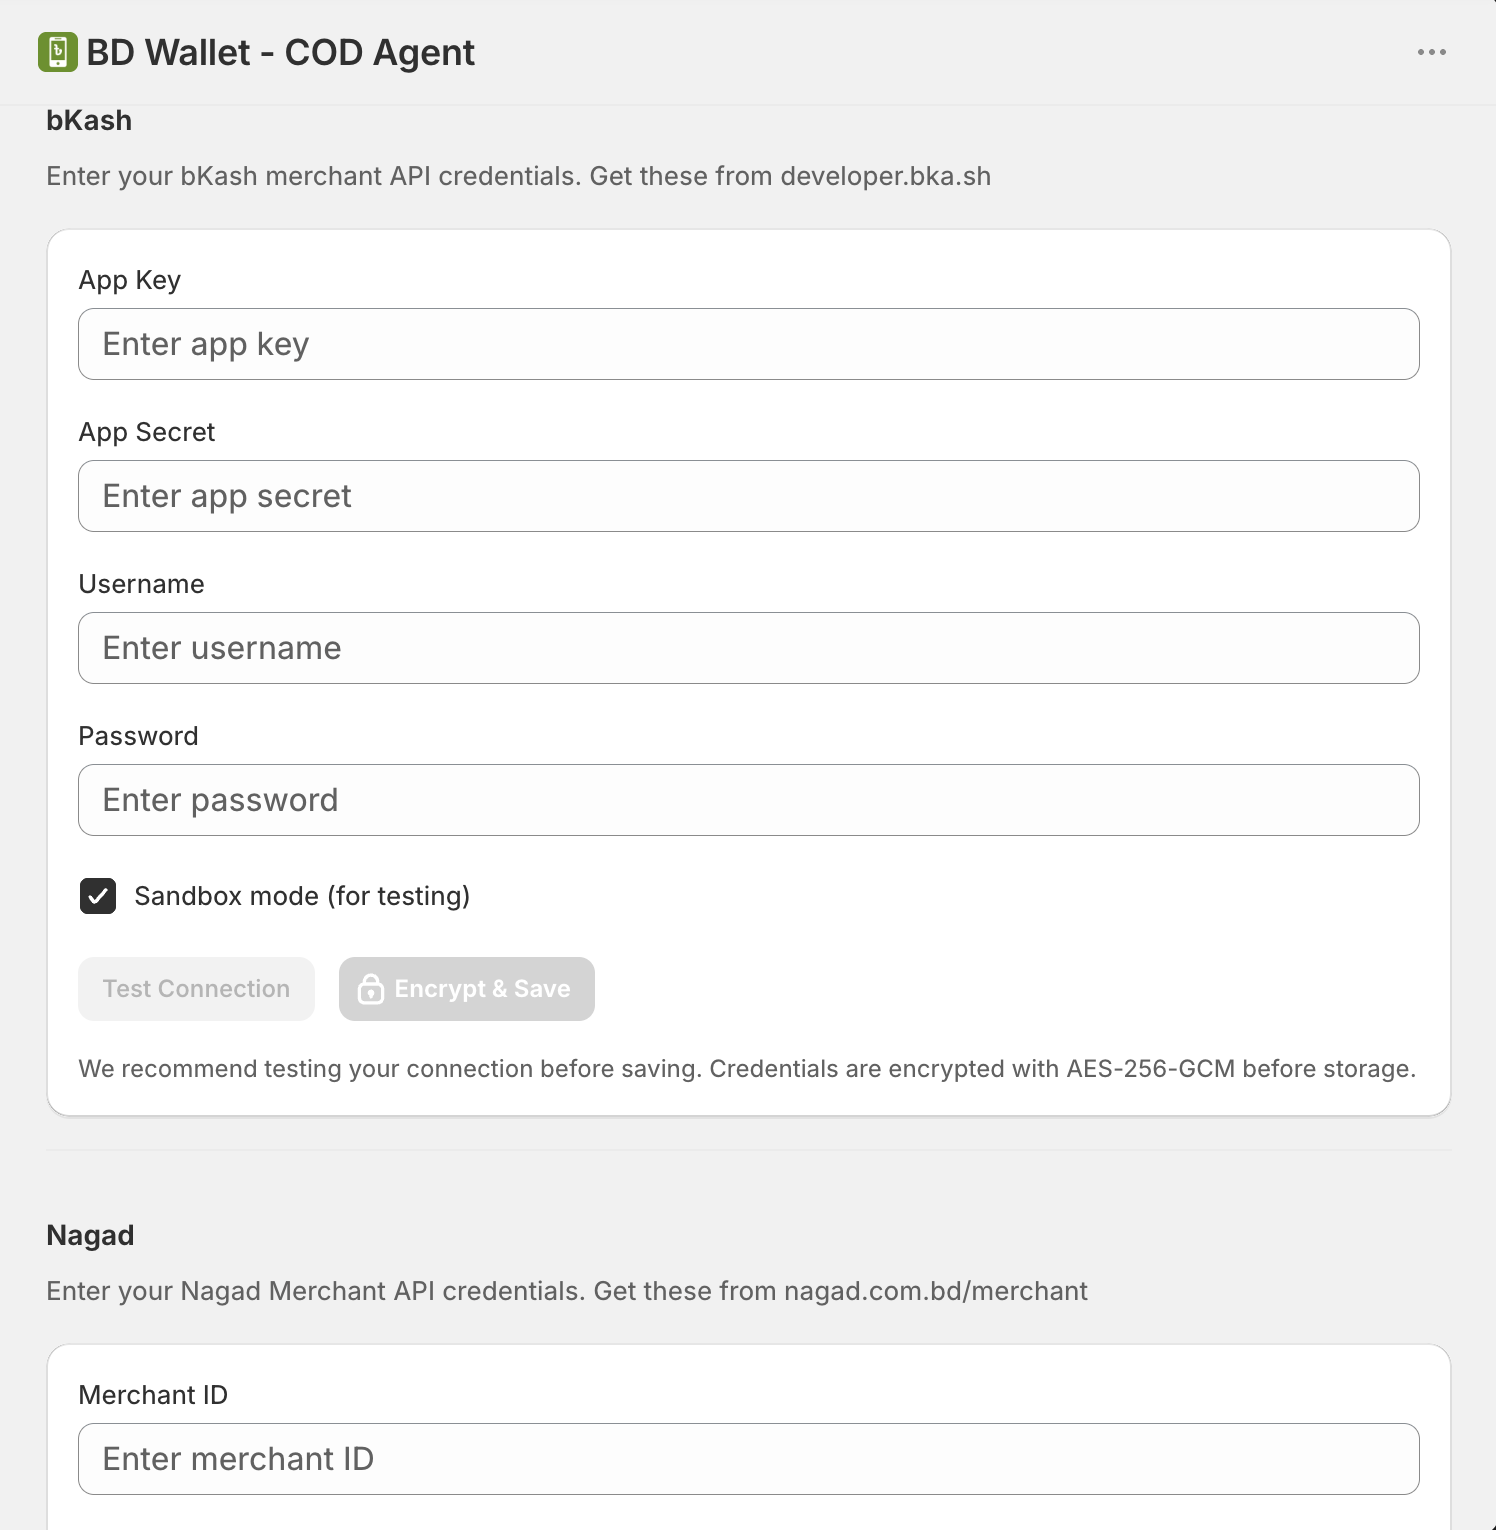
The BD Wallet setup screen inside Shopify admin - enter credentials, toggle active, done
Step 5 - Set Up COD Automation (Optional but Recommended)
If you plan to offer Cash on Delivery - and in Bangladesh you almost certainly will - BD Wallet handles that too.
Go to Orders → COD Settings and pick when the payment link goes out:
- On Order - immediately after the order is placed
- On Fulfillment - after you mark the order as shipped
- Manual - you send it yourself from the dashboard
This turns COD from a cash collection headache into a digital payment flow. Instead of calling customers after delivery, they already have a payment link waiting.
BD Wallet also checks each COD order against Bangladesh's largest courier fraud database and shows you a risk badge - Low, Medium, or High - before you spend money shipping it.
Step 6 - Set Up Shipping
For local delivery in Bangladesh, set up shipping zones under Settings → Shipping and delivery:
- Create a Bangladesh shipping zone
- Add flat rates per district or a single nationwide rate
- Connect a courier like Pathao, Steadfast, or RedX if you want automated tracking
For international shipping, you can add zones later once your local operations are running smoothly.
Step 7 - Go Live
Before you open your store to customers, run through this checklist:
- Place a test order and confirm the bKash/Nagad payment link arrives
- Complete a test payment and confirm your Shopify order marks as Paid
- Check your store on mobile - this is how most of your customers will see it
- Set up your custom domain if you have one (Settings → Domains)
- Remove the Shopify storefront password (Online Store → Preferences → uncheck password protection)
Total setup time from scratch: 2–4 hours.
What Does This Actually Cost?
| Item | Cost |
|---|---|
| Shopify Basic plan | ~$29/month |
| BD Wallet Starter plan | Free (10 transactions/month) |
| BD Wallet Growth plan | ৳1,499/month (500 transactions) |
| BD Wallet Business plan | ৳2,499/month (unlimited) |
| bKash merchant fee | ~1.5% per transaction (varies) |
| Nagad merchant fee | ~1% per transaction (varies) |
For most stores starting out, the free BD Wallet plan is enough to test things before committing.
Frequently Asked Questions
Can I use Shopify in Bangladesh?
Yes. Anyone can create a Shopify store from Bangladesh. The limitation is payment gateways - Shopify Payments is not available here, so you need a third-party solution like BD Wallet to accept bKash and Nagad.
Do I need a trade license to set up a Shopify store?
No trade license is needed to create the store itself. However, bKash and Nagad merchant accounts typically require a trade license for approval.
How long does bKash merchant approval take?
Usually 3–7 business days after submitting documents. Nagad is often faster.
Can I accept both bKash and Nagad at the same time?
Yes. BD Wallet supports both gateways simultaneously. Customers can choose which one to use when they receive their payment link.
What happens if a customer does not pay?
BD Wallet lets you resend payment links manually from your dashboard. You can also set orders to auto-cancel after a set period if payment is not received.
Is COD still worth offering in Bangladesh?
Yes. COD still makes up 60–70% of orders for most Bangladeshi ecommerce stores. BD Wallet's COD automation and fraud detection make it manageable without eating your margins.
You Are Ready to Sell
Setting up a Shopify store in Bangladesh is straightforward once you solve the payment problem. Shopify handles everything else better than any other platform - and BD Wallet handles bKash and Nagad so your entire payment flow runs automatically.
You do not need a developer. You do not need a custom payment gateway build. You need about half a day and a BD Wallet account.
Install BD Wallet free on Shopify and start accepting bKash and Nagad payments today.
Tagged:
Ready to accept bKash and Nagad on your Shopify store?
Free plan available. No developer needed. Set up in 10 minutes.
Get Started Free